Understanding Unsharp Mask
Photoshop offers many methods of sharpening. Unsharp Mask can be considered the "traditional" method, and provides a great deal of control when used correctly.
This tutorial addresses output sharpening – that is, sharpening performed at the end of your workflow, for print or web.
General sharpening guidelines:
- Don’t sharpen your master file. Once your image is enhanced to your satisfaction, you should create a copy of it and flatten the layers, before preparing it for output.
- Sharpening is very specific to output, so it should be the last thing you do. You must crop and resize your image (and apply noise reduction if necessary) before applying any form of sharpening.
- When evaluating your sharpening, make sure you are viewing at 100% size on screen. No other size will give you accurate representation of the pixels you are sharpening.
- While it’s easy to sharpen for web, because WYSIWYG, it takes a while to get a "feel" for sharpening for print. Your image on screen is much larger than your resultant printed image, so some interpretation is required. With practice, you’ll know what works.
How Unsharp Mask works:
The Unsharp Mask filter works by finding edges in an image (where a dark colour meets a light colour) and placing two lines along the edge – a darker line along the dark edge, and a lighter line along the light edge right next to it. In this very exaggerated example you can see the adjacent dark and light lines around the text:

Achieving good sharpness:
The goal of perfect sharpening is to get those sharpening lines just right. They need to be strong enough to make the photo appear sharp, yet not quite strong enough to be noticeable.
1. Straight out of camera and resized. No sharpening applied:

2. Careful sharpening applied. The photo appears sharper to the viewer:

3. Too much sharpening applied. The sharpening lines (often called "halos") have become visible:

Of course, sharpening is a matter of taste. What seems like "good" sharpening to me might seem like too much or too little to you.
The Unsharp Mask dialog:
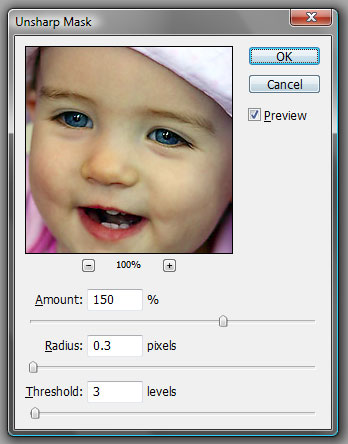
The USM filter gives us three controls – Amount, Radius and Threshold.

Let’s take a look at what each one does. I’ll discuss them in the order in which I usually adjust them.
The Radius slider:
The Radius slider controls the width of the sharpening lines (those light and dark lines I was talking about). I always set the Radius first.
Choosing the correct radius is critical to good sharpening. Like I said, they need to be wide enough to have an effect, but not quite wide enough to be visible to the viewer.
Some suggested Radius settings:
- Website: 0.2-0.3 pixels
- Small to medium photographic prints: 0.3-1.0 pixels
- Canvas printing: 1.0-2.5 pixels
The radius is very closely related to the resolution of the print file. Higher resolutions require larger radii.
The Threshold slider:
Threshold is probably the most important control to get right. It’s also the most difficult to understand, but I hope I’m about to change that!
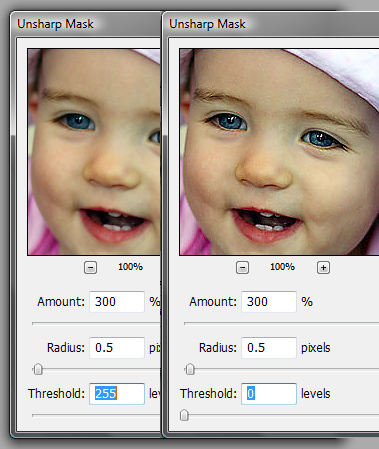
By adjusting the Threshold slider, you are dictating how different two pixels need to be for Photoshop to apply sharpening.
The Threshold slider goes from 0 to 255, because that is how many levels of colour per channel are in your image.
When the slider is at 255, nothing at all is sharpened – that’s rather pointless. When the slider is at 0, every single little bit of detail is sharpened – that’s usually unwise. In practical terms, your Threshold adjustments will range from 0 to 20, and in most cases from 1 to 10.

So, what is it doing, exactly? Well, if your slider is at 5, you’re saying to Photoshop: “If two adjacent pixels are so similar in colour that there’s less than five levels of difference between them, please don’t sharpen them. But if the difference is greater than five levels of colour, go ahead and apply the sharpening lines”.
Choosing the right Threshold:
The Threshold adjustment can usually be summed up as the balance between detail and noise. You want to choose a Threshold low enough to sharpen the important details of your photo, but high enough not to sharpen any unwanted noise.
The most common form of noise comes from high ISO settings. If you shoot jpeg (as I did for the above photo), jpeg noise is also a consideration. And for portraiture, a Threshold setting so low that it sharpens pores and creases in skin is undesirable, and will probably offend your subject.
On the other hand, if your output destination is a coarse medium like canvas, or a dotty print process like offset printing, you can get away with a bit of noise, because it is "absorbed" during printing.
So you can see how carefully you must choose your threshold. I suggest starting around 2-5, and evaluating and adjusting from there.
The Amount slider:
Put simply, Amount is how strong you want the sharpening to be.
A low Amount setting means that the sharpening lines are quite subtle; whereas a high Amount setting will give you very dark and very light lines.
I usually start at 250-300, and adjust up or down as suitable.
Some other uses of Unsharp Mask:
Google these terms for some other applications of the USM filter:
- Local Contrast Enhancement. The use of high Radius and low Amount settings will achieve a very broad, soft sharpening effect which gives the appearance of increased contrast in the photo. It’s a poor substitute for real contrast, and I rarely use it.
- Luminosity Sharpening. Loosely speaking, this allows tonal details to be sharpened, but not colour details. Some photographers use it religiously – I, however, rarely find it necessary.
More resources:
