How to make a star shape in Photoshop CC
Adobe make it weirdly difficult to draw a simple star shape in Photoshop. There are a few steps to follow.
This tutorial is recorded in Photoshop CC. The interface was different in older versions, but the principles were similar.
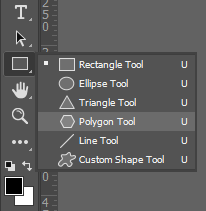
First, click and hold on the Rectangle Tool near the bottom of the toolbar, and chose the Polygon Tool:
Then in the Options Bar, make sure it's set to "Shape". Also a good idea to leave the Stroke at 0 px for now:

A little further along the Options Bar, you can choose the number of points you want your star to have (you can change this later):

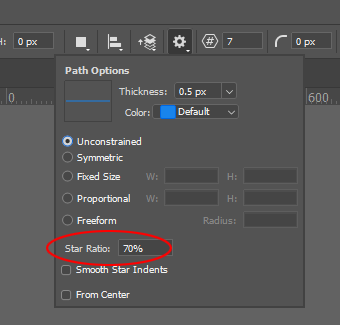
Then click on the cog icon to display the other options. The main one we need is the confusingly-named "Star Ratio" setting (which used to be much more sensibly called the "Indent" setting), which controls how far inwards the points of the star go:
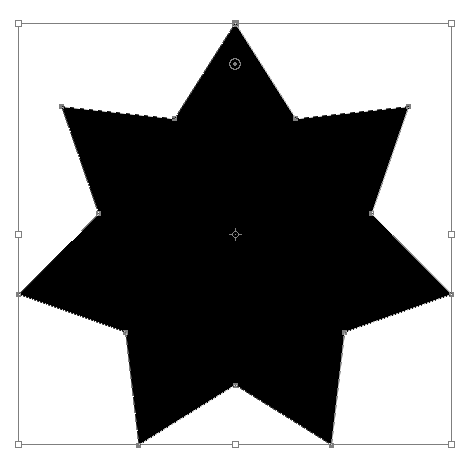
Then click and drag to draw your star shape:
After that, go to the Properties panel to play with the Appearance of the shape. You can choose the Fill colour, and add a border (Stroke) if you like.
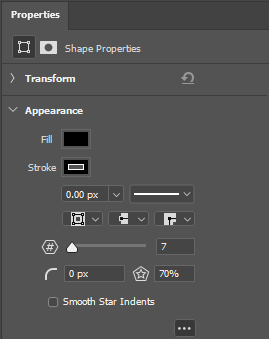
You can also change the number of points, and the indent. And if you wish, you can also make the points rounded, as I have done below, or the indents rounded too.