
Grids tutorial
Photoshop is full of little things that you don’t need much in day-to-day editing, but it sure is handy to know where they are when you need them.
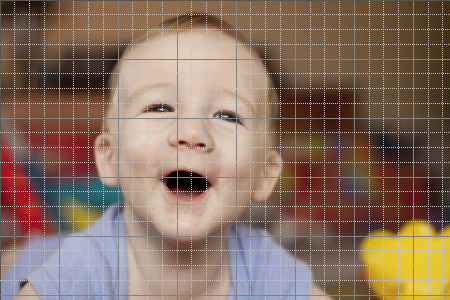
Grids are one such thing. They’re pretty self-explanatory – an overlay of gridlines on your image.
To turn on the grid, just press Ctrl ' (apostrophe), or View>Grid. You’ll get something like this:
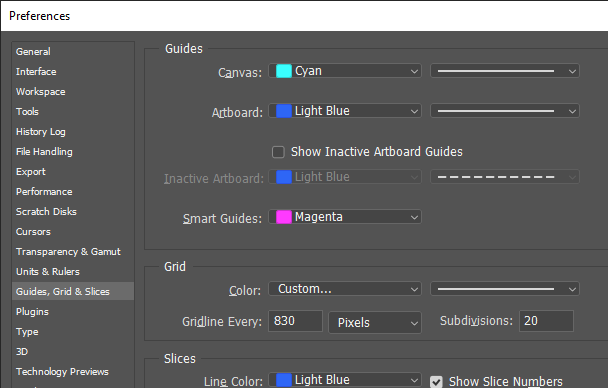
The thing about grids is, you hardly ever need them the same size twice. So, you need to be familiar with adjusting them. To do this, you go to Edit>Preferences>Grids Guides & Slices (the exact name varies a little between version of PS/E, but you get the idea):
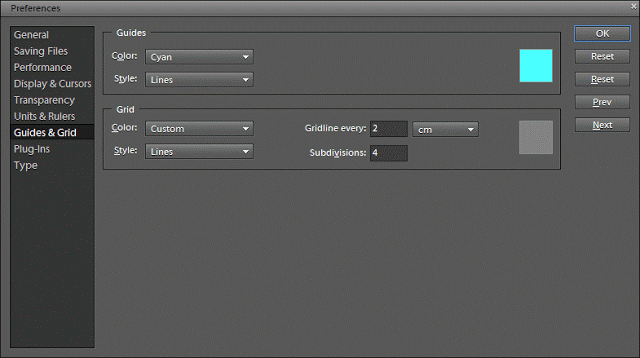
Once again, pretty self-explanatory. You can change the colour of the gridlines, or their style. Most importantly, you can change their size. In the above screenshot, the main gridlines occur every 2cm, with 4 subdivisions (slightly lighter gridlines) per grid. Essentially, this means there’s a gridline every half a centimetre.
You can choose your grid to be any darn size you like. It all depends on your needs. One day you might need gridlines every four inches, with three subdivisions. Another day you might need gridlines every 100 pixels, with only one subdivision (one subdivision essentially means that the grid isn’t subdivided at all – try it and you’ll see what I mean).
Why would you need grids?
Well, I was prompted to write this post because the lovely Iris from California wrote to me asking about straightening a photo of a room that was all bent out of shape from lens distortion. My suggested solution involved turning on the grids, then using the Transform tools to correct the distortion until the verticals in the photo aligned with the vertical gridlines.
That’s a bit of an obscure one, but pretty darned important for Iris and her real estate shots.
The most important reason for grids is in storyboard design, collage assembly, and other layout-type activities (eg digital scrapbooking). The ability to turn on a grid, and easily align all your photos without having to drag guides here and there, is wonderful.
Don’t forget you can also instruct Photoshop to snap your design elements to the gridlines, once again via the View menu. "Snapping" is where you can drag a layer (a photo, or text, or whatever) around, and it jumps to align itself with the grid. Of course, this can also be annoying sometimes, so you’ll find yourself turning "Snap" off and on occasionally.
Personally, my biggest use of grids is for my restoration work. When I’m spending hours on painstaking cloning and healing at the smallest pixel level, it’s easy to lose track of which parts of the photo I’ve done, and which I haven’t. So I turn on a fairly large grid, and do my editing one section at a time.
As I said at the start, you might go for weeks and even months at a time without needing grids, but don’t forget about them! They can be very useful now and again.