
Photoshop’s "Arrange" functions
Not everyone is aware of the power of the "Arrange" options in Photoshop and Elements. Adobe allows us wonderful control if we have multiple photos open at once.
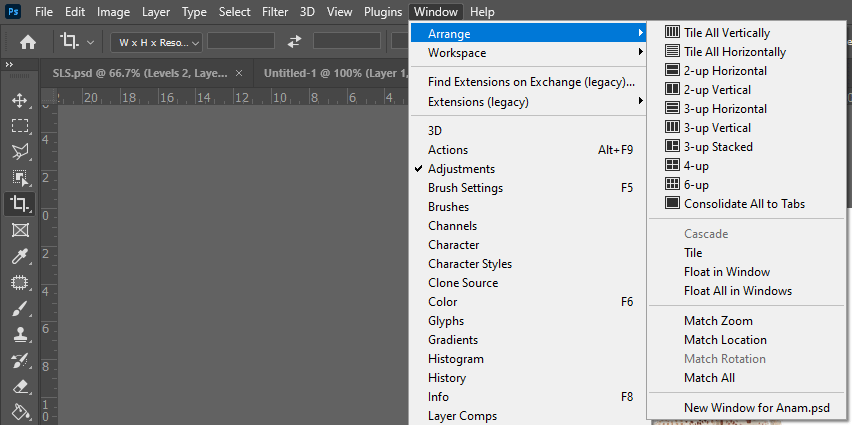
They're accessed via the Window menu:
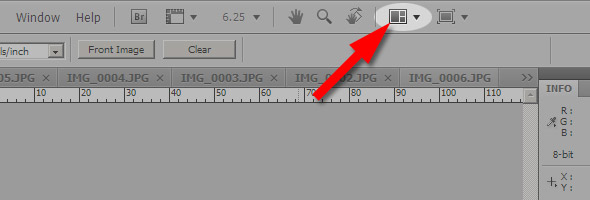
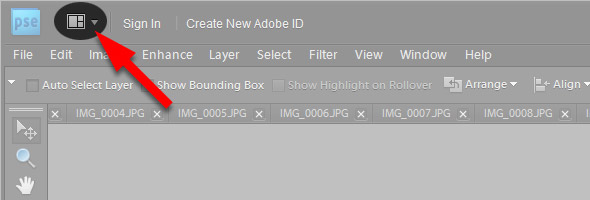
In some versions they're also available via a handy button at the top of the screen:
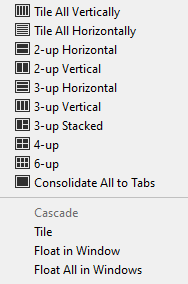
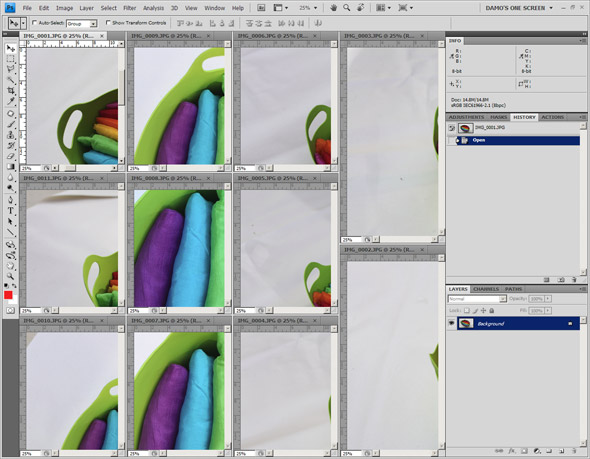
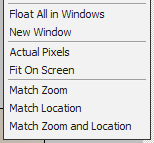
As you can see, it gives lots of choices for how you'd like to view all your photos:
I encourage you to play around with them all. The one I use most is "Tile". It just fills my screen as best it can with all the images I have open.
Then if I want to go back to the normal view, I choose "Consolidate All to Tabs".
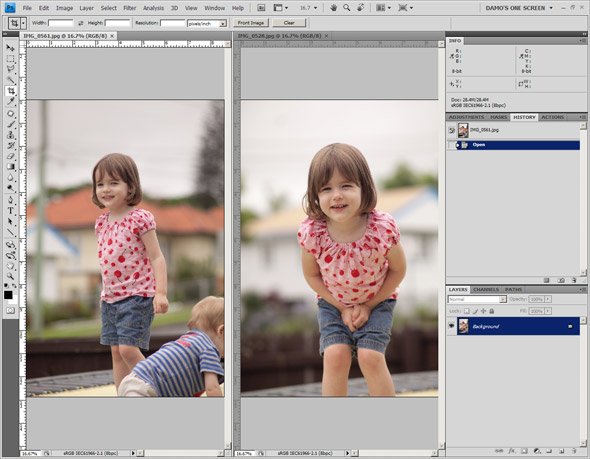
Very often I only have two photos open - one that I'm editing, and the other one that I'm referencing for colour matching. In that case, I use the "2-up Vertical" option, and it puts them side by side:
By default, it divides the screen evenly. But we can change the balance any way we want. All we need to do is grab the bar between the windows …
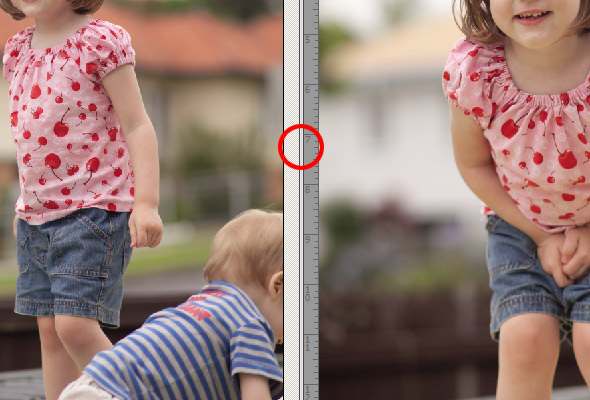
… and move it where we want it:

If you have a split screen like this, and you open a new file, it will open in a tab to share the window with your previously selected image. If you would like to view all three images at once, choose "3 up" from the Arrange menu. Or, if you’d like to move an image from one window to another, simply grab it by its tab and drag it across. And when you want just one window again, choose the "Consolidate All" button.
When will you use this?
You might be wondering when you’ll use these functions. I can think of two important applications.
The first one I mentioned a few sentences ago – comparison while editing. If I’m editing a set of images, and I want them to be consistent (consistency is hard, isn’t it??) I’ll edit the first one, then keep it open in a small window, whilst I edit each of the others. By continually comparing my edits back to the first photo, I ensure a standard result across the set.
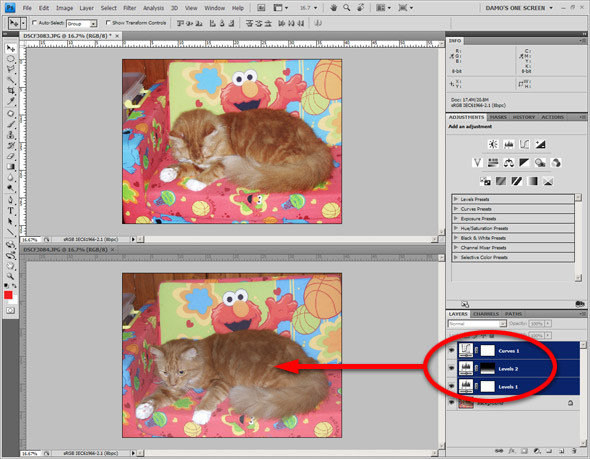
The second application is somewhat related to the first – transfer of layers. If I’ve edited one photo from a set, it is often handy to apply the same adjustment layers straight to the next photo. This can save a lot of time. So I make both photos visible, select the edited image, then go to the Layers Panel and highlight the layers I want to transfer. Drag and drop – done!
There's a third reason you might use this - when assembling collages or storyboards. It might suit you to have all your images open and visible, to easily choose/copy/paste onto the layout. However, I really don't recommend this, since copying and pasting prevents the images from being all-important smart objects. Much better to drag and drop them from Bridge instead.
What about the other options?
"Float All in Windows" is like the very old "Cascade" option from CS2 and earlier. It "un-docks" everything into floating windows:
I really can't think of any reason to use this, unless you're pining for the old days. But try it for kicks. To put everything back into tabs again, choose "Consolidate" as usual.
"New Window" is an interesting one. It makes a new window which is an exact "live" copy of your current image. At first glance it looks like you’ve duplicated the image, but no – it’s still the same image, but you’ve now got two views of it. If you do something to the image in one window, you’ll see the same adjustment appear in the other window. I believe high-end retouchers use this so that they can be doing close-up dodge-and-burn work in one window, and be watching the effect on a zoomed-out view in the other window. Play with this function, because it might be very handy to some of you.
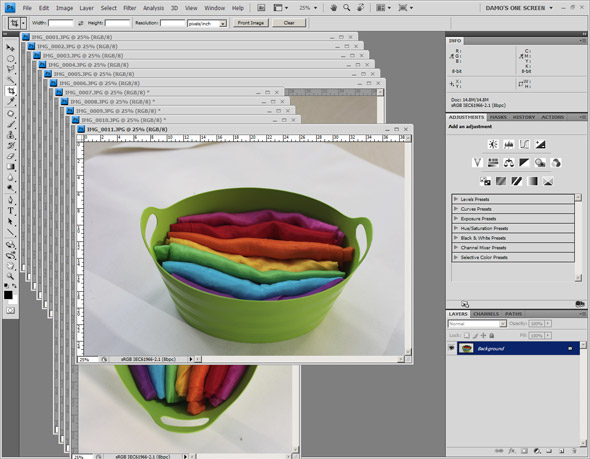
The "Match" options are handy. Remember this?

Sure, all my images are visible on screen in their own windows, but they’re so zoomed in that I can’t really make out what they are. All I need to do is select one, zoom out a bit so I can see it at an appropriate size, then choose "Match Zoom". Bam! All the other windows will zoom out to the same size, and instantly I have a better view of my selection of images.
"Match Location" means that if I am viewing the bottom right hand corner (for example) of one image, that function will instantly let me see the bottom right hand corner of all the other windows as well.
That’s about all there is to tell you. I hope this explanation will help speed up your workflow a little.