
Flipping an eye
This quick tutorial describes flipping an eye to replace a crooked false eyelash. However, the principles of this method have far greater reach. Copying-and-flipping can be used to repair tiny things like eyes and teeth, huge things like entire sections of background, and everything in between.
This tutorial was recorded in Photoshop, but applies equally to Elements, with the exception of one minor differences which I’ll mention along the way.
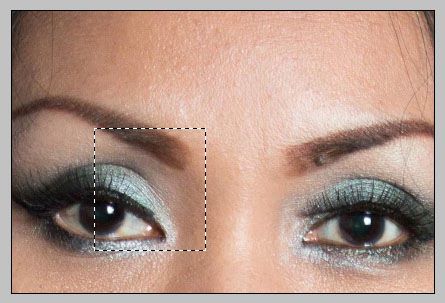
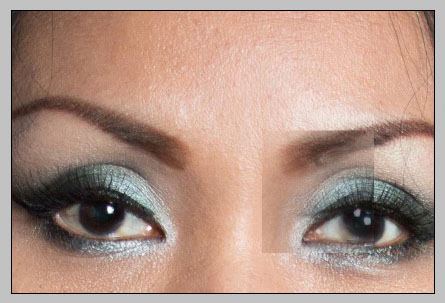
Here’s a close view of the problem. You can see how her left (our right) eyelash is crooked. So begin by using the Rectangular Marquee Tool to select the good eye. Always make sure you select more than you need:
Then press Ctrl J (Cmd J for Mac) to put that selected chunk on its own layer, then use the Move Tool to move it over a bit:
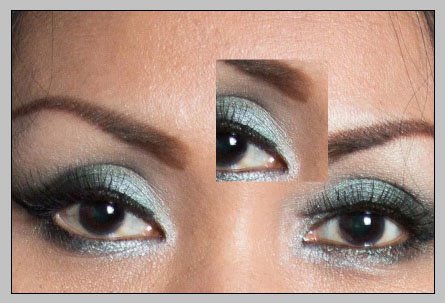
Flip that layer to face the desired direction. In Photoshop, this is done via Edit>Transform>Flip. In Elements, it’s Image>Rotate>Flip:
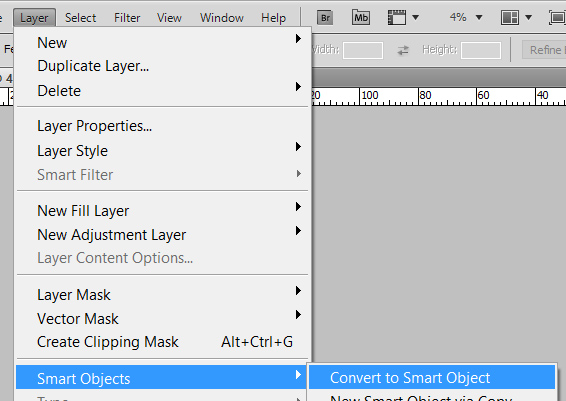
Next, convert that layer into a Smart Object by going to Layer>Smart Object>Convert. This will protect the quality of the eye a little. However, this feature isn’t available in Elements, so PSE users can skip this step.
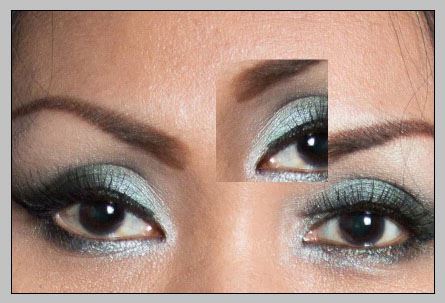
Lower the opacity of the layer to about half, then move the eye into place. The angle isn’t right, of course, but you’ll deal with that in the next step. For now, make sure the tear duct is lined up in both layers:
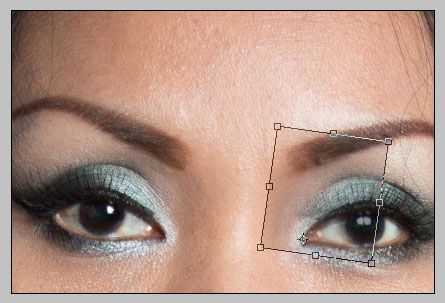
Press Ctrl T (Cmd T for Mac) to activate the Transform handles.
Alt-click (Mac: Option-click) on the tear duct to position the centre marker there. Remember how I said to line the tear ducts up in the previous step? Putting the centre marker on that point ensures that they will stay lined up, and the rest will rotate around this point, to make the lashes line up:
Once you’ve transformed it to your satisfaction and pressed Return/Enter to finish the transformation, increase the layer opacity to 100% again:
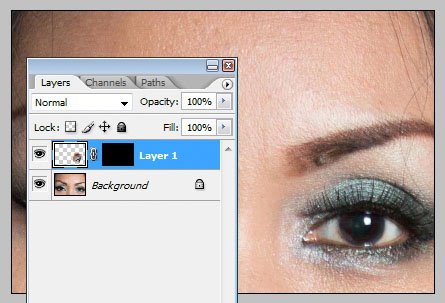
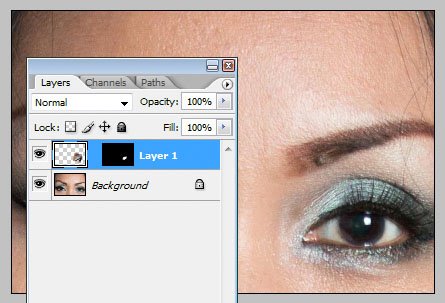
Now it’s time to add a black mask to the layer, to hide the new eye altogether:
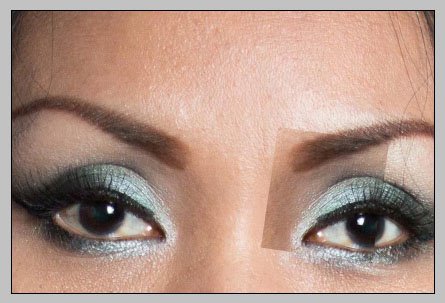
Then paint on the mask to reveal the required area:
Now it’s all lined up and looking great, except that the lighting is different – the new segment is a bit too bright for the area. That’s no problem, simply add a Dodge & Burn layer and clip it to the eye segment layer, then paint to darken as needed:

(In some cases, you might need to use both layers from The Handyman Method, for full and exquisite control over the lighting.)
That’s all there is to it! Keep this method in the back of your mind, because it will help you in lots of situations.
If any of the fundamental principles of layers and masks in this tutorial are confusing to you, please consider my little class. It will help you understand SO much more about your amazing software.
Some examples
Over the years I've given about a bazillion pieces of advice involving copying and flipping. Here are four examples: