Sizing photos correctly for Australian passports
This page last updated: September 2024
General information about passport photos
If you've been asked to take a passport photo, make sure you go to your country's government website and read the requirements carefully. Passport authorities are very picky.
Broadly speaking, the actual photography requirements don't vary much across the world. Even lighting, plain background, straight angle, nothing obscuring the face, etc. I know that you'll be able to follow all the guidelines fairly easily.
There are two areas where photographers tend to get confused:
- "No retouching": When the guidelines say this, don't be fooled into thinking the photos must be completely SOOC. You must shoot raw as usual, and you must do the standard raw processing (white balance, exposure, contrast, etc) as usual. The "No retouching" rule refers to pixel editing - that is, you must not edit out wrinkles or pimples or flyaway hairs or anything like that.
- Sizing: Everyone gets confused by the size requirements, and they vary from country to country. But don't worry, it's really easy to get exactly right when you know how. That's why I've written this tutorial.
Australian passport photo size requirements
At the time I last updated this page, these were the specifications on the Passport Office website:
PLEASE make sure you check these specs for yourself. I won't accept responsibility for sudden changes by the government. If you discover a change, please contact me so I can update this page.
STEP 1: Do the raw processing
Process the raw file in the usual way - white balance, exposure, contrast, etc, etc. When you've finished, don't open the photo into Photoshop. Just press Done to close it.
STEP 2: Make the new blank document
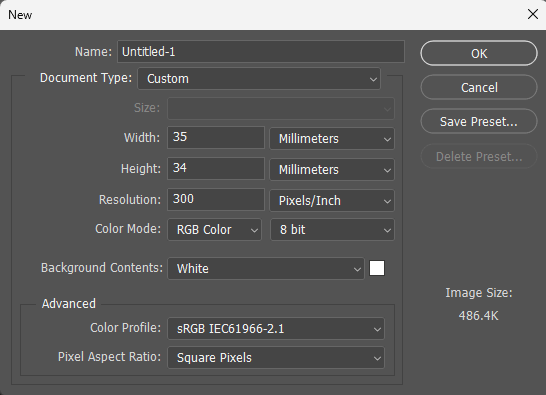
In Photoshop, set up a new document 35x34mm at your lab's print resolution. (Most labs are 300ppi, but yours might differ.) Of course it must be sRGB colour profile:
STEP 3: Add a centre guide
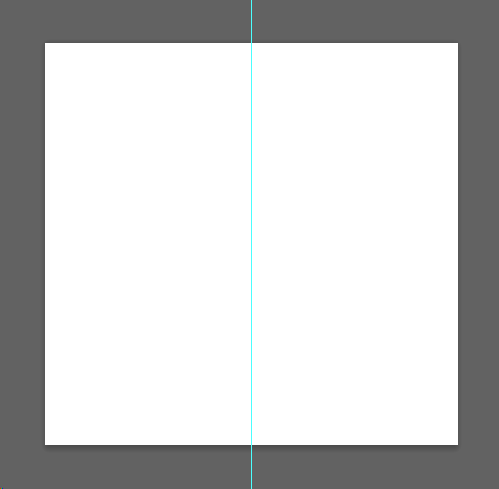
This step isn't compulsory, but I think it's a very good idead to add a vertical guide right in the centre of the document:
STEP 4: Place the photo
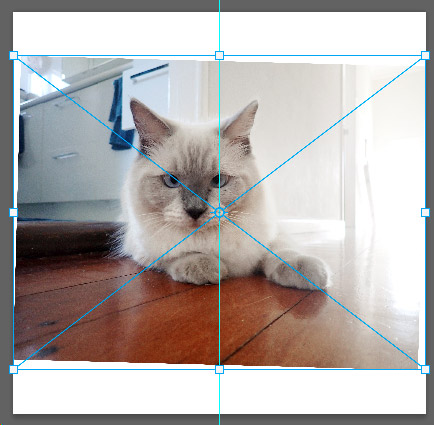
Go to File>Place Embedded and choose the edited raw photo. (If you have Photoshop Elements, or an older version of Photoshop, it might be simply called "File>Place".)
STEP 5: Resize
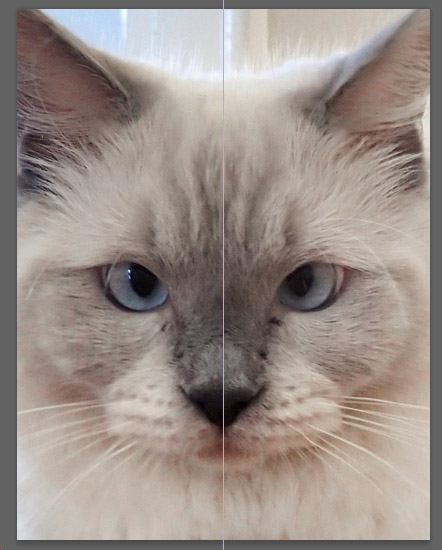
Resize the photo so that the crown of the head is just touching the top of the window, and the tip of the chin is just touching the bottom of the window. Also move the photo sideways if necessary, to make sure the nose is centred on the guide.
STEP 6: Increase height
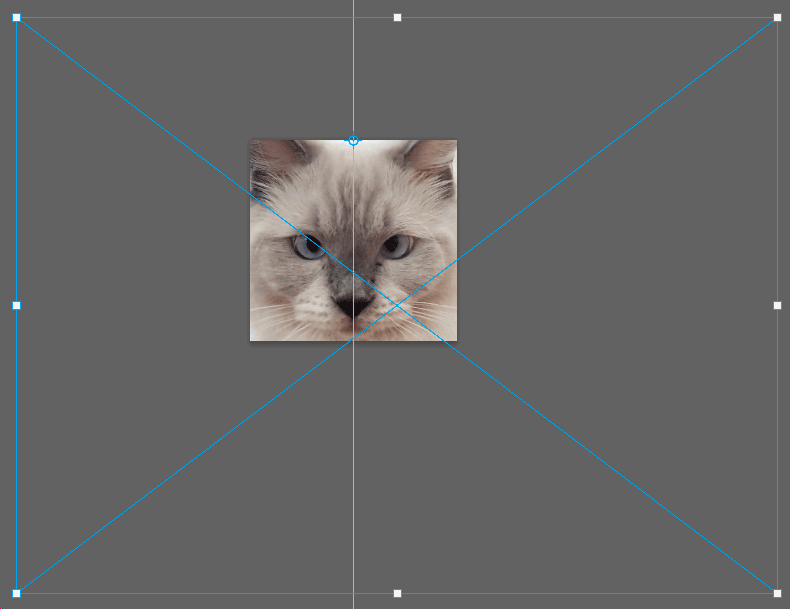
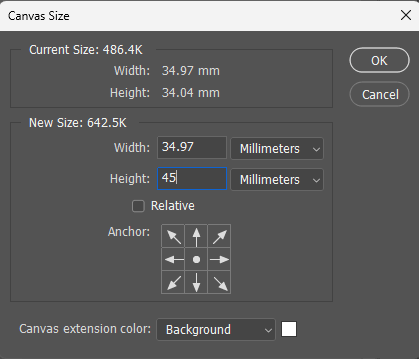
Go to the Canvas Size dialog and change the height of the file to 45mm:
This will reveal more of the photo:
STEP 7: Nudge the photo up
The photographer in you will probably be offended by seeing the face centred vertically in the frame. You can move it upward slightly to satisfy your compositional feelings.
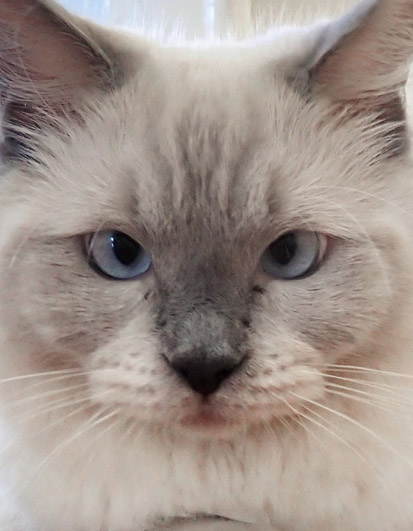
And you're done! The overall file is the correct size, and the face is the correct height, exactly as the requirements state. Save the file as a PSD.
Prepare for printing
You need to provide two copies of the photo to the passport office. So we're going to produce them both on one 6x4" print.
1. Flatten
Flatten the layers.
2. Canvas Size
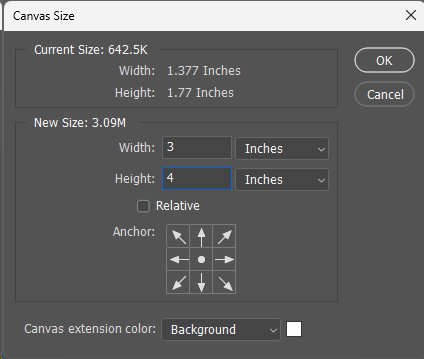
Go to the Canvas Size dialog, and increase to 3x4 inches. Make sure the background colour is white!
3. Duplicate layer
Ctrl J to duplicate the layer. Now your Layers panel looks like this:
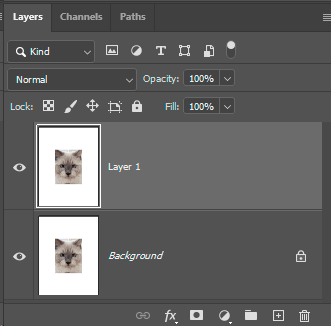
4. Canvas Size again
Go to the Canvas Size dialog again, and increase to 6x4 inches. Make sure you click on the left grid square:
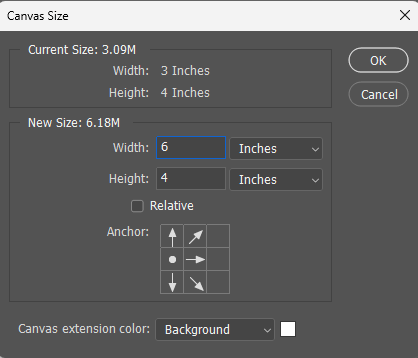
5. Move across
Move the top layer across, so that both photos are visible. Now your layers will look like this:
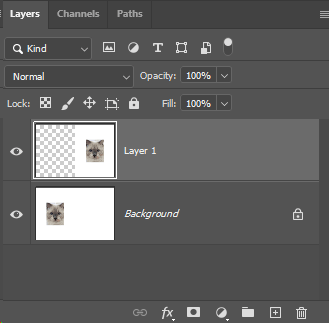
6. Flatten and save
Flatten the layers, then save the file as a jpeg, ready to send to the lab for printing.
