
Restoring a damaged photo
To be honest, my restoration procedures are more "evolutionary" than "strategic". I usually just pick a place to begin, then roam around the photo wherever my mouse takes me. I massage parts of the photo until, eventually, the whole thing is satisfactory.
Therefore, it’s difficult to summarise my technique. However, as always, I start by correcting the whole photo, then large areas, before getting down to small details.
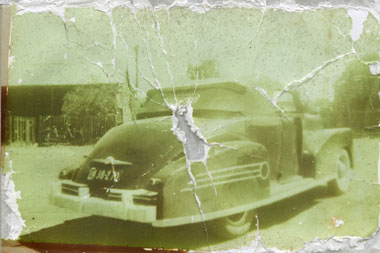
Step 1:
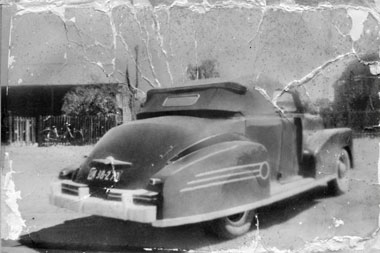
As if being faded and discoloured wasn’t enough, this small photo has been left in a shirt pocket and put through the wash. I begin by scanning it in 16 bits-per-channel colour.
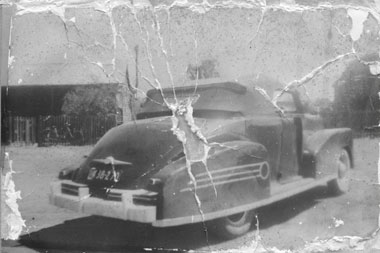
Step 2:
First, I convert to monochrome. Photoshop offers various methods of black-and-white conversion, and I usually try them all to see which gives the best starting point for the restoration. In this case, I end up choosing humble desaturation.
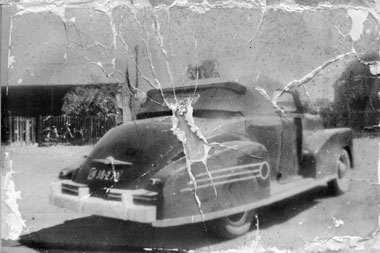
Step 3:
I begin by making various contrast and lightness adjustments, first globally, then selectively. This gets the photo "in the ballpark", ready for repair.
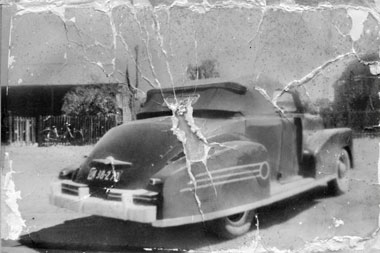
Step 4:
Using the Clone Stamp and Healing tools, I smooth out the texture on some of the panels of the car. This is important, because I’ll need to copy the texture in the next step.
Step 5:
Time to tackle the back window. I start by cloning some of the little cracks away from the top …
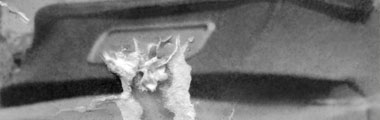
… then I grab a slab of texture and place it on a new layer over the damaged area …
… and using a combination of Layer masks, Quick masks, Curves and Hue/Saturation, I slowly meld it into the photo.
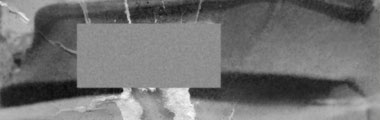
Step 6:
Gradually, I repeat the above steps until I’ve repaired the entire hole. I congratulate myself, knowing that the hard part is done. But there’s still a lot to do.
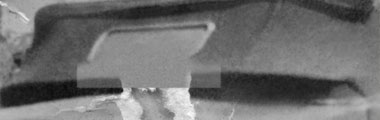
Step 7:
Little by little, I work my way around the photo, cleaning up all the spots and scratches. I use a textured gradient for the sky, and similar for some of the ground. Yes, it’s cheating, but the result is satisfactory.

Step 8:
Finally, a few last contrast adjustments, some subtle smoothing in the shadow areas where the texture is a little too strong, and a gentle high-pass sharpen.
