
Some layer mask tricks
Some handy time-savers for your Photoshop workflow.
Mask options
Have you ever right-clicked on a layer mask? If you do, you get these three wonderful options – Add, Subtract and Intersect:
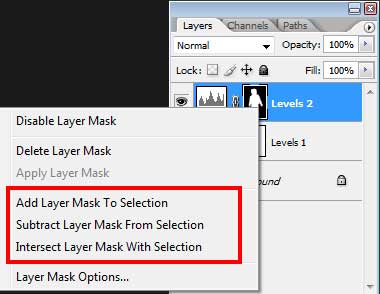
They may not seem like much, but they can speed up your workflow considerably, by reusing your masks.
Let’s take a look at examples …
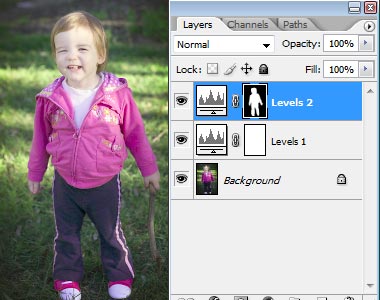
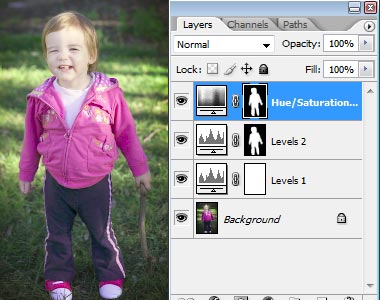
Our sample image
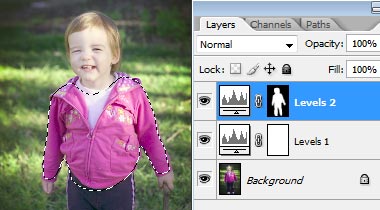
Here’s my photo. I made one global Levels adjustment, then selected Amelie and made a second Levels adjustment on her:
"Add Layer Mask To Selection"
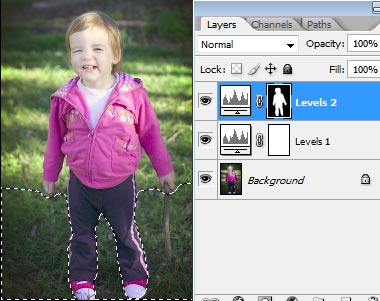
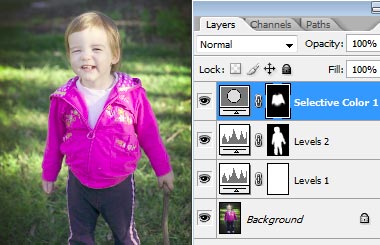
Let’s say I want to now add a little saturation to Amelie. I don’t need to make the mask again, or even copy it to the new layer. I simply right-click on the existing mask and choose "Add":
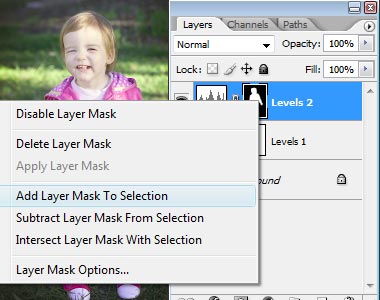
Voila! The selection is re-activated …

… ready to be applied to the new Adjustment Layer:
Shortcuts:
To quickly re-select a previous selection, simply Ctrl-click on the mask. If you’ve made a new selection, and you want to add the old one to it, you can Ctrl-Shift-click on the mask.
"Subtract Layer Mask From Selection"
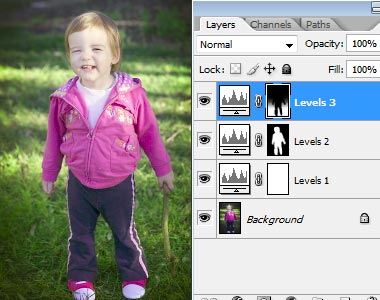
Ok, what if I want to brighten that grass behind her legs? There’s no need for careful masking around her body – I’ve already done the hard work! I simply select the whole area …

… then right-click on the existing mask and choose "Subtract":

The body selection is removed from the grass selection, ready for me to enhance the grass:
Shortcut:
To quickly Subtract, simply Ctrl-Alt-click on the mask.
"Intersect Layer Mask With Selection"
This time, I want to brighten up her jacket. Again, there’s no need to select it too carefully – I’ve already done most of the hard work! I can very quickly and roughly select the jacket area …

… then right-click on the existing mask and choose "Intersect":
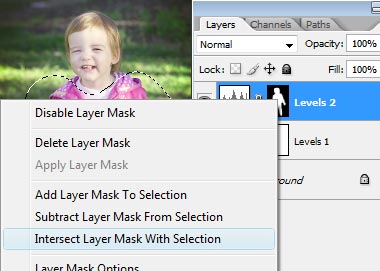
The jacket selection is trimmed down to intersect with the body selection, ready for me to enhance the jacket:
Shortcut:
To quickly Intersect, simply Ctrl-Alt-Shift-click on the mask.