
Photoshop vignette methods
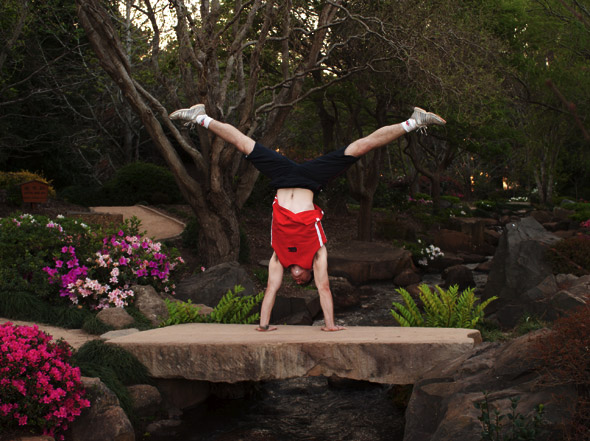
Vignettes can add a touch of emphasis and "punch" to a photo if used well. In this tutorial, I’ll discuss a few simple vignette methods in Photoshop and Elements.
Before I get into the nuts and bolts, I want to start with a couple of important points:
1. Be gentle
To my mind, a vignette shouldn’t be a prominent feature of a photo – in fact, the casual observer shouldn’t be consciously aware that a vignette has been added at all. Its purpose is to subtly draw the viewer’s eye to the important features of the photograph.
I think the majority of established photographers would admit, if pressed, that they went through a strong vignette phase which they now regret. It might have been trendy at one stage, and who knows? – it might come back. But right now, I think less is more.
(Disclaimer: I’ll be applying stronger-than-usual vignettes in this tutorial, for the sake of emphasis.)
2. Always keep it on its own layer
I know I bang on about layers a lot, and I know that not everyone saves their layered files as fastidiously as I do. But vignettes are awfully dependent on the chosen output size – if you apply your neat vignette to a 2:3 full frame image, then your client orders a 4:5 print (eg 8×10), your vignette might end up looking unbalanced. In that case, you need to be able to modify the vignette layer to suit the new crop. Plus, of course, you can easily reduce the strength of the vignette layer at a later date, if you find you were a bit too enthusiastic.
Vignette methods
Ok, let’s get into it. All of the screenshots in this tutorial have been taken in Elements 9, and will work just the same in Photoshop. I’ll be discussing the use of Levels, but everything I suggest applies more or less identically to Curves, if you’re a Curves user (Comparison of Levels and Curves). Oh, and all of the vignetting I’ll be demonstrating will be of the darkening variety, because that’s my favourite, but you can reverse the adjustments to achieve a lightening vignette if that’s your thing.
First, I’ll discuss the application of vignettes, then I’ll discuss three main styles that you can use.
Method 1: Apply/hide/mask
This method involves darkening the whole image, then hiding the effect, and painting it on as desired.
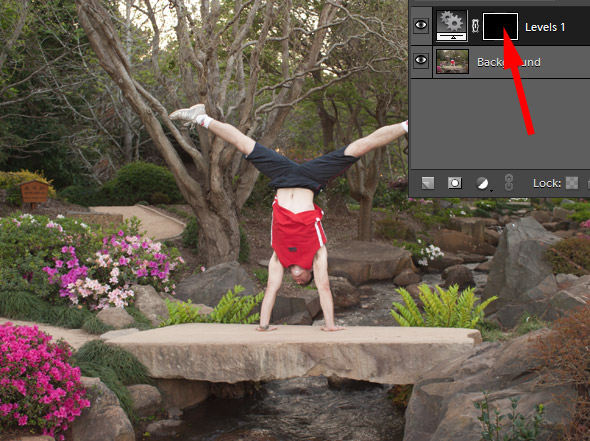
In this example, I apply a Levels layer to darken the photo (more info about Levels further down the page):
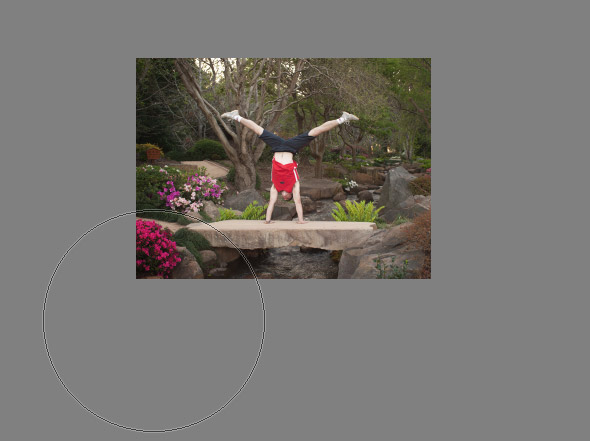
Then press Ctrl I to invert the layer mask from white to black, thereby hiding the effect:
Then paint with a big soft white brush to gently introduce the effect around the edges where I want it:
This method is quite "manual", and as such might not suit everyone’s workflow. But it certainly allows very precise manipulation, particularly if you use a brush at reduced opacity. It’s a good method if you want to apply a non-uniform vignette.
Method 2: Select/apply
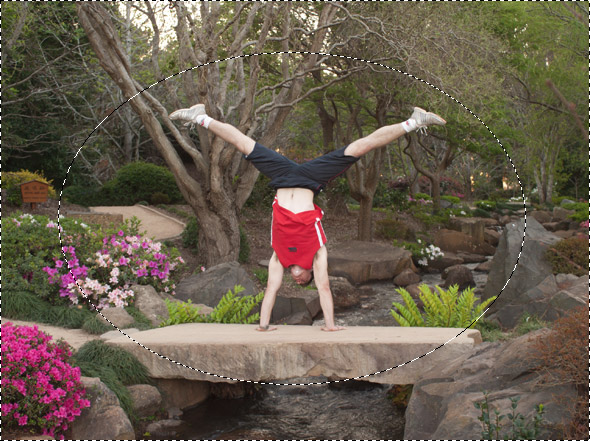
This method is a more direct approach, but needs a bit of forethought. I choose a Marquee Tool – usually elliptical, but sometimes rectangular:
Then I draw a marquee around the image, a little way in from the edge. (How much is a "little way"? As much as you think the photo needs. Every photo is different.)

At this point, a lot of people recommend feathering the selection. I don’t recommend that. It’s just too darn hard to know how much feather is enough! If you’ve ever tried it, you’ll know what I’m talking about. It’s utter guesswork, and too easy to get wrong. I prefer to wait until I can see what I’m doing. Stick with me here, I promise you’ll like my suggestion …
I press Ctrl Shift I, or "Inverse" from the Select menu:
Which gives me a selection of the outer part of the photo:
Then I add my Levels layer, which immediately turns the selection into the layer mask. I darken it to my taste:

Right now you’re thinking: "Um … Damien? What the heck? Not subtle, buddy!"
I know, I know. But here’s the advantage – now I can see the feathering as I apply it. I simply choose "Gaussian Blur" from the Filter menu, and blur the mask as much or as little as I want to:
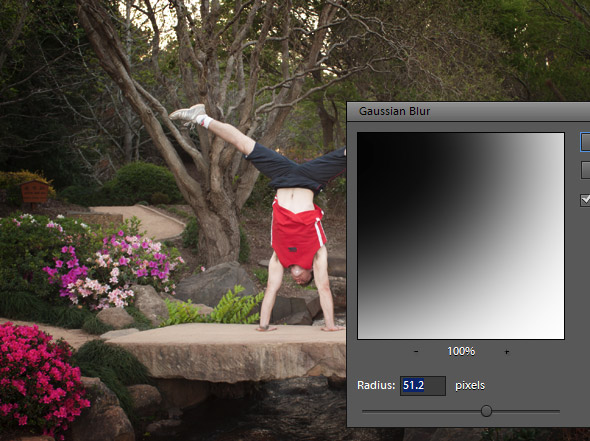
Blurring a mask is exactly the same as feathering a selection, except with visual guidance. Much easier!!
Needless to say, once you’ve blurred the mask to your taste, you can also paint on it with the Brush tool to fine-tune it.
About the Levels adjustment
The way I see it, you can make a vignette by manipulating the shadows, the midtones, or the highlights. (Or sometimes a combination of those three). All of those options are available right there in Levels.
Shadows
This is the aggressive one. By moving the black slider inwards, you’re clipping blacks in your vignette area. This gives your vignette real impact, and wouldn’t be suitable for sweet newborn photos and that sort of thing, I’d suggest.
In this example I’ve brought the black slider in to 68, which has caused clipping (loss of visible detail) around the edges.

(Note: This is equivalent to using an adjustment layer on “Linear Burn” mode, if blend modes are your thing. I don't recommend them.)
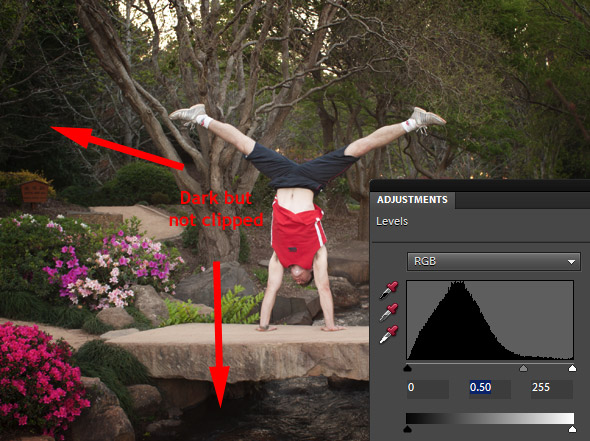
Midtones
This is the most natural one, and it’s certainly my favourite. It darkens the area, but doesn’t cause any loss of detail:
(The blend mode equivalent to this is “Multiply”. Again, not a fan.)
Highlights
This is less common, I think, but still necessary from time to time.
One small problem you might have noticed with the previous two methods – they both leave whites white, no matter how much they darken everything else:
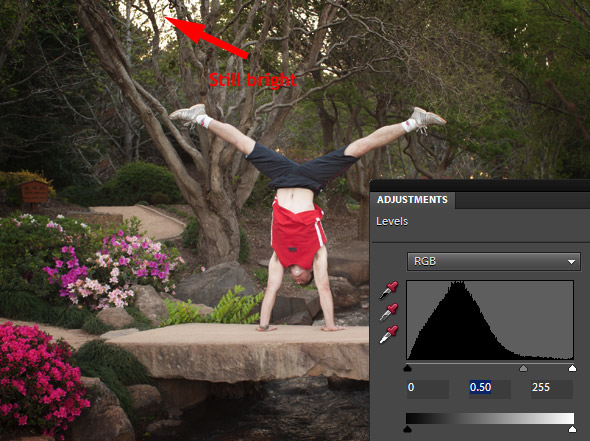
The problem isn’t too bad in this photo, but can really mess up your plans in other photos, especially ones with bright skies. So, you might need to move the white slider … not the usual white slider, but the Output one:
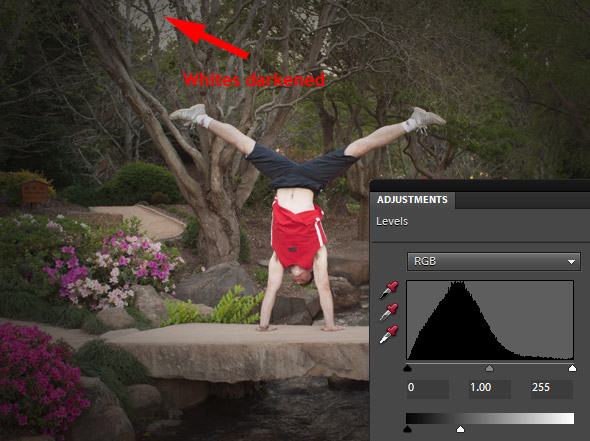
See how I’ve moved the lower white slider two-thirds of the way across? That’s darkened the white areas, so that patch of sky is no longer glaring.
This method really robs the area of contrast, so you might like to combine it with a bit of shadow or midtone adjustment to maintain a bit of pop.
(I don’t think this method has a blend mode equivalent.)
That’s about all I can think to tell you about vignettes. The point of my post was to show you that there are different methods for different situations, but they’re all easily accessible right there in Levels. Play and discover!