Blanket fade tutorial
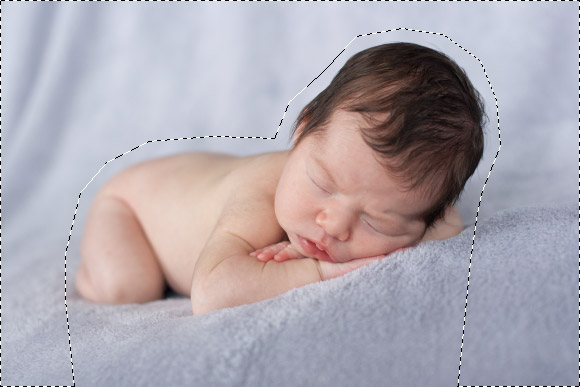
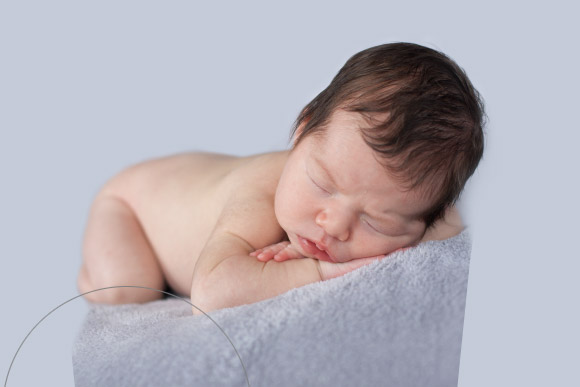
By popular demand, I finally got around to writing this tute. Let’s take a look at what we’re aiming to achieve:

It’s the classic blanket-blurring-off-into-the-distance. In most cases, it’s really easy to do, as I’m about to demonstrate.
Before I start, I must express my gratitude to Amy Cope Photography for the use of this gorgeous image. Thanks Amy! Also, I’ve recorded this tutorial in Photoshop Elements 9. I never pass up an opportunity to show Elements users how seriously their software ROCKS. This method works in all versions of Photoshop and Elements.
Important - Before you begin
Read my Adding a noise layer tutorial and set up a noise pattern the way I demonstrated. We’ll need it later. Please don’t attempt this method until you’ve done so.
Step 1
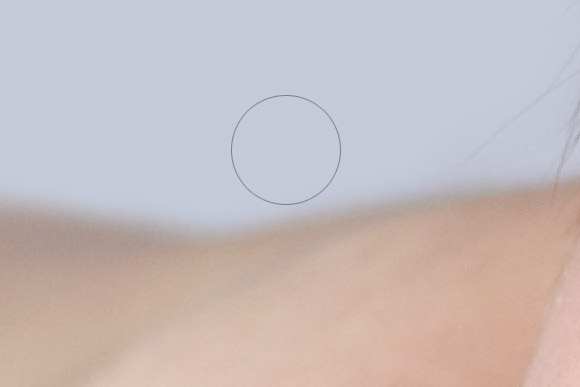
Take your eyedropper tool and sample a piece of background colour that you wish to use. My firm advice is: sample from the area next to the most difficult piece of hair! That wispy piece that you really don’t want to have to mask around. You can see the area I chose:

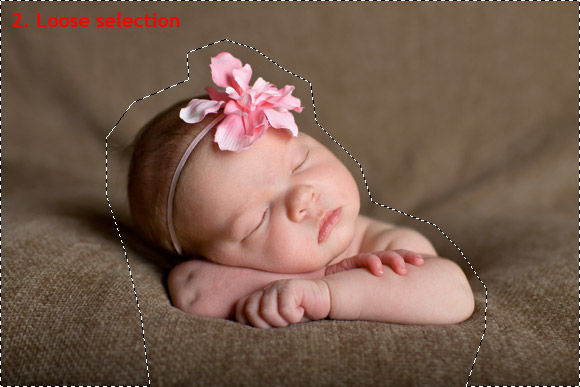
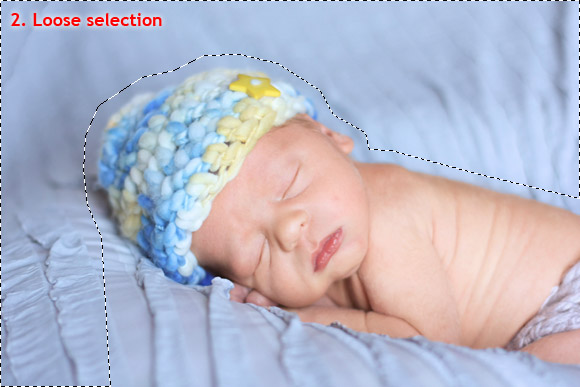
Step 2
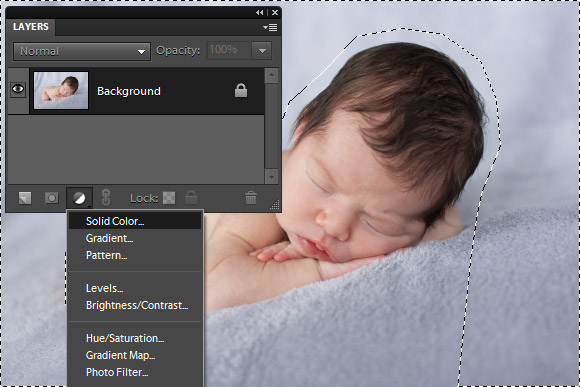
Use your Polygonal Lasso Tool to loosely select around the subject, and down to the foreground at each side (you can use the plain Lasso Tool if you like, but I find it too clumsy):
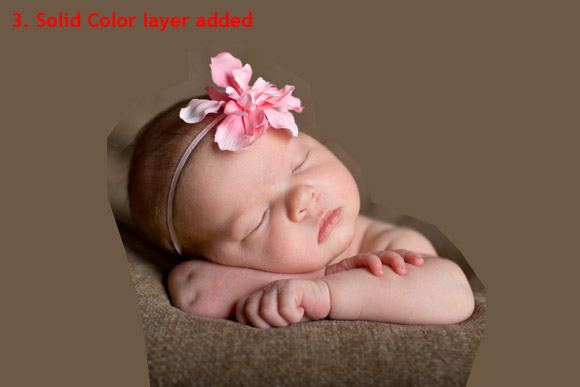
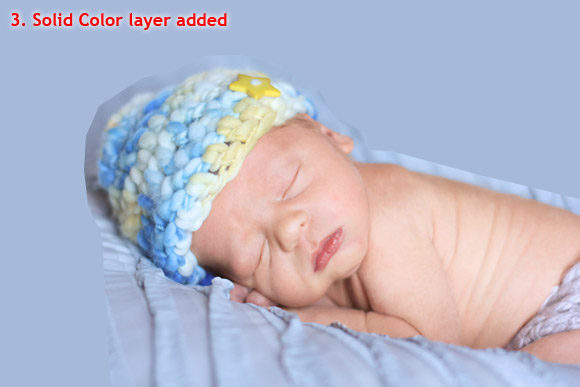
Step 3
Add a Solid Color layer:
The result will look like this. You can see how, because I chose a colour very similar to the original background, it’s already blending quite nicely without my help:
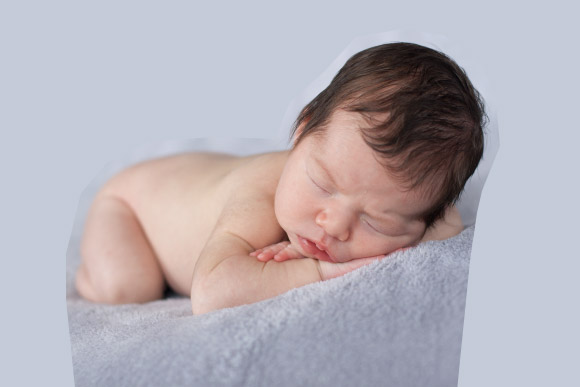
Don’t forget that you can easily change the colour of the layer at any time, just by double-clicking it in the Layers panel. It’s important to keep this in mind, because sometimes you’ll find you haven’t sampled quite the right colour.
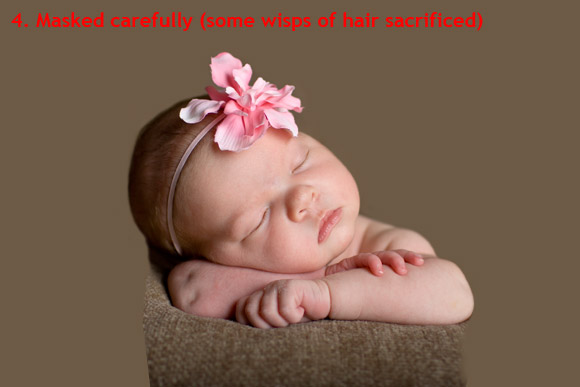
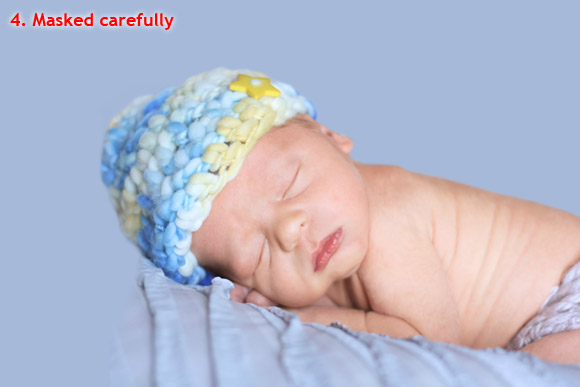
Step 4
Zoom in and mask around the subject with a white brush. You’ll need to vary the brush size and opacity as you go around. This part takes a bit of time, but if the existing backdrop is fairly evenly-lit, and you’ve sampled your colour from nearby the trickiest bit of hair, it shouldn’t be too difficult.
Here’s my result. You can see the hard-edged bits falling away towards the foreground, but that’s not a problem – I’ll be fading that out soon.

Note: This is fundamental masking stuff. If it’s foreign to you, please consider my little Layers & Masks Class. It will change your life.
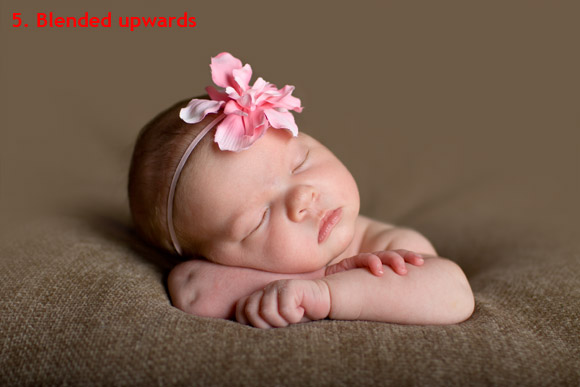
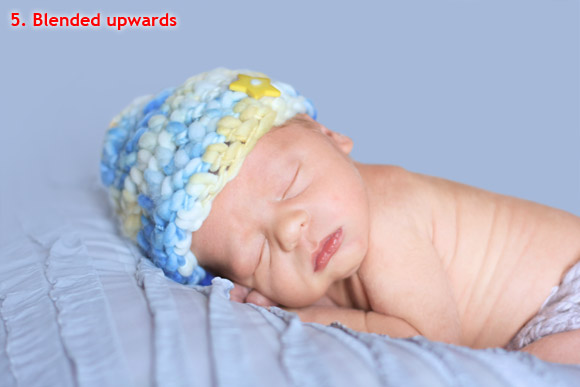
Step 5
Now choose a big soft brush and gently paint with black from the bottom upwards, gradually blending the blanket into the colour layer. The bigger the brush, the more gentle the transition will be:
Here’s my result:

And here’s the mask I used:

Finished? Well, yes, you could be. If you’re happy with flat colour in your background, then you can stop at this point, and be happy.
Me, I’m rarely happy with flat colour. I love a very subtle bit of vignetting – I think it adds to the credibility of the edit.
There are oodles of ways to add a vignette to an image, and I’ve written about them in my vignette tutorial. However, I like to take the easy approach in this method, and it works well for everything except very light backgrounds.
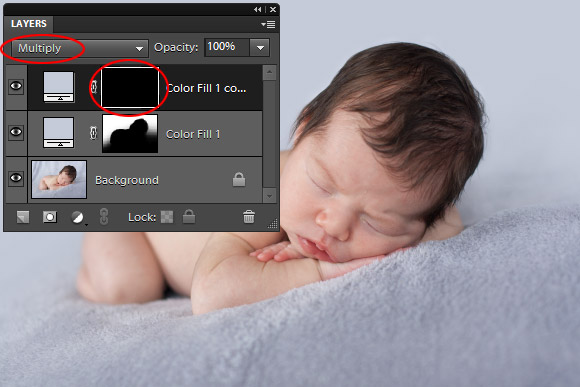
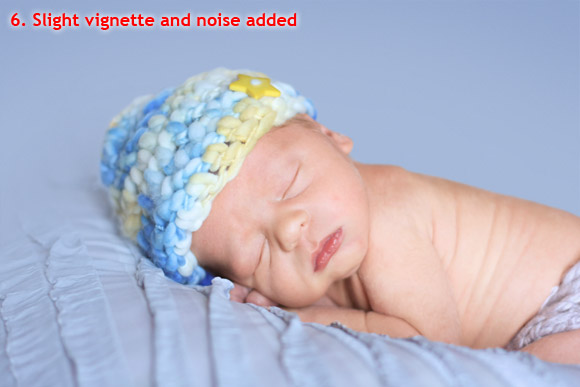
Step 6
Duplicate the Color layer, then change its blend mode to “Multiply”, and fill its mask with black (Edit>Fill).
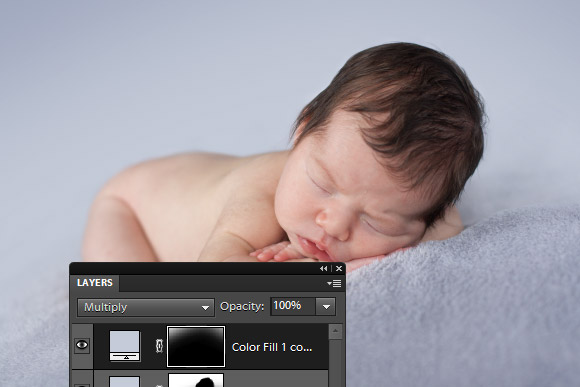
Step 7
With a big, soft, low-opacity white brush, very gently paint around the edges to create a slight vignette. Please don’t overdo it!
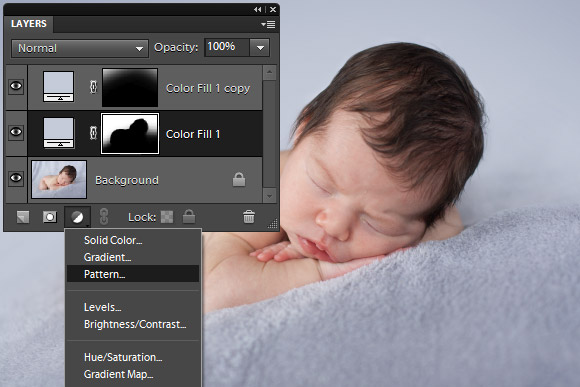
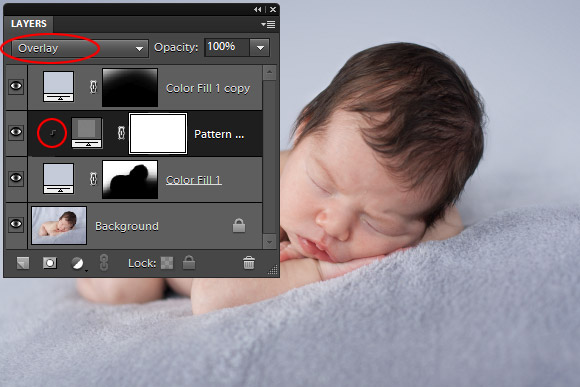
Step 8
Finally, it’s time to add our noise, so that our vignette doesn’t suffer banding. Return to your original Color layer, then add a Pattern layer:
Step 9
Choose your noise pattern preset, and set the layer blend mode to "Overlay" or "Linear Light" (examine both to see which looks better). Then clip the noise layer to the Color layer (Ctrl G in Elements, Ctrl Alt G in Photoshop). That ensures that the noise is only applied to the backdrop, and not to the subject:
And that’s it! Let’s take one more look at the result:
I hope you have lots of fun with this. Needless to say, if you’re having trouble following the steps, just give me a shout in Ask Damien and I'll help you out.
More Examples
Many thanks to Amanda Miley for this image:

And thanks to Jennifer Davidson for this one: