
Some alternatives to cloning
The Clone Tool is one of the handiest tools in Photoshop, and we couldn’t live without it. But it’s not always the best, quickest or easiest way. Here, I discuss some other options.
What the Clone Tool is good for:
For quickly removing small unwanted specks from your image, there is nothing better than the Clone Tool.
This is not a Clone Tool tutorial, so if you need to learn how to use it, consult your Photoshop Help file, or our friend Google. Pay particular attention to tutorials which explain how to clone on a separate layer. Two important articles here and here.
Where the Clone Tool can let you down:
As soon as you begin to correct bigger areas of your photo, two problems can start to appear:
1. Repeated patterns.

If you fail to vary your source point enough, it quickly becomes obvious that you’ve been cloning.
2. Blurred detail.
But if you vary your source point too much, all the detail can get fuzzy.
The above examples are quite clumsy, to illustrate the point. In most cases, I’m sure you will be able to execute your cloning with much more skill than I have done here.
The point is, repetition and blurring are the two things you must be wary of when cloning. If you are trying to clone a large area, and either of these occur, you should consider one of the following techniques.
Method 1 – Use the Healing Tools:
The Healing Tools are like super-intelligent versions of the Clone Tool. They can clone texture while preserving colour, and various other tricks. For complex editing, these tools can give much better results than cloning.
However, even the Healing Tools are not infallible. You may find they don’t work too well near the edges of an image, and like cloning, they can be unwieldy on large areas.
This is not a Healing tutorial, either. Once again, read the Photoshop Help, or look for tutorials via Google.
Method 2 – Copy pixels from nearby:
Often it’s easier to copy the pixels directly, using a selection, than to clone them.
There are various ways to achieve this, depending on the complexity of the subject. A knowledge of layers and layer masks is essential for this kind of editing.
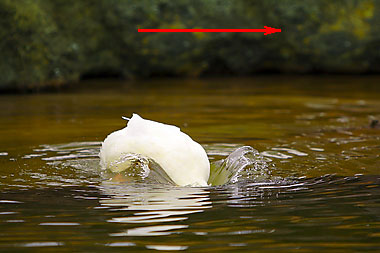
Let’s look at an example. This beautiful photo is somewhat ruined by a pipe in the background:
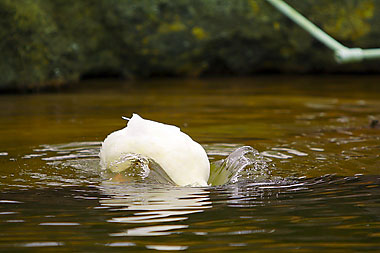
Thanks to Brad Edwards for permission to use this photo.
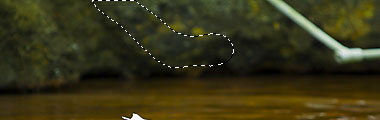
I select an area of detail which matches the target area:
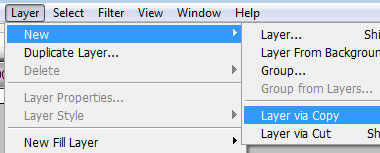
Then I make a new layer from the selected area (the shortcut is Ctrl-J):
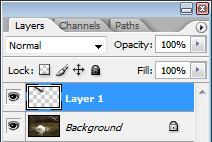
Now you can see that there is a small piece of background on its own layer …
… which I can move across to sit neatly on top of the pipe:
Then I add a mask to the layer if necessary, to blend the edges. Easy.
This can also be made to work even when the tones don’t quite match. Let’s get rid of the pesky lamp and power cord in the background of this photo:
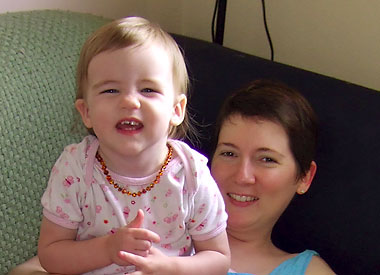
I’ve copied a piece of wall from the right-hand side, and moved it across and up. It fits beautifully, but the colours are a bit lighter:

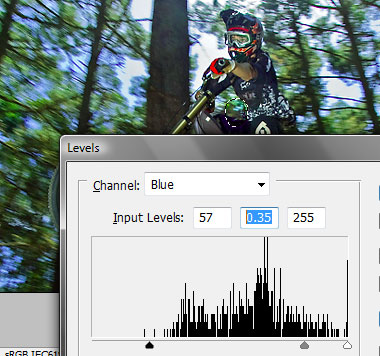
No problem, it just needs a slight midtone adjustment in Levels (or Curves) …
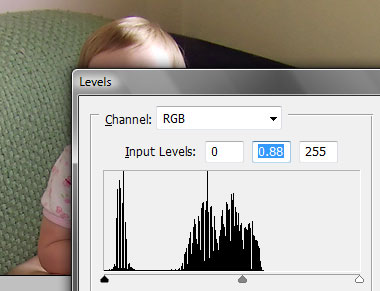
… and nobody is any the wiser!

So you can see where this technique is superior to cloning. Firstly, it's a little fiddly to correctly align the cloning to make sure the edge of the couch remains straight. Secondly, the difference in tones would make it tricky to get right.
But with a simple copy, paste, move and darken, it’s all done.
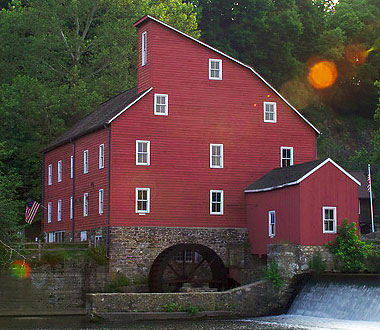
Method 3 – Use the pixels that are already there:
This charismatic photo has an unwanted sun flare right across it. Let’s begin by addressing the flares on the building. Cloning would be difficult, because of the complex detail under the flares:
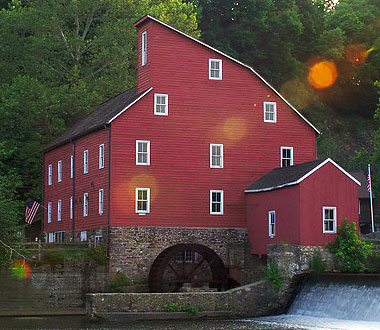
Thanks to Will Gilles for permission to use this photo.
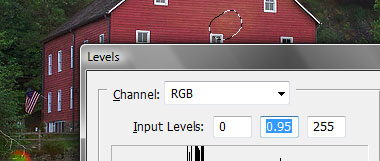
If we look at the individual channels, we can see that the main effect is on the Green channel, minor effect on the Red channel, and negligible effect on the Blue channel:
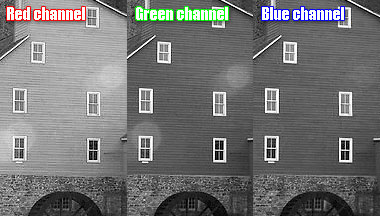
(Learn much more about channels in The Channel Mixer Class.)
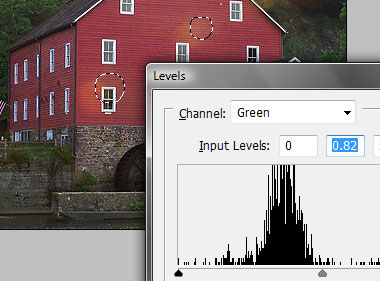
I select the two strongest flares …

… and use Levels to strengthen the Red and Green channels:
Another selection and adjustment here …
… and here …
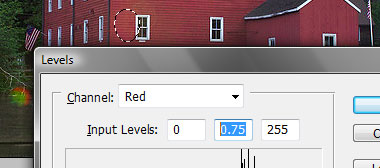
… and I’ve all but removed the problem in this area:
Another example here. Some pesky purple flare in an area of complex detail – very difficult to clone:
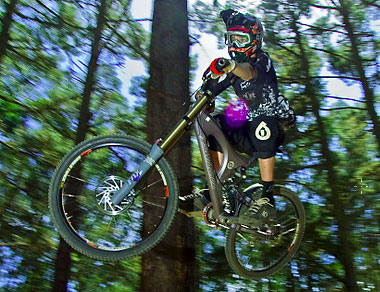
Thanks to Nathan Lattyak for permission to use this photo.
Again, it’s simple enough to select the area, and make the necessary adjustments:
Of course, this method requires some skill with selections, and a basic knowledge of Levels or Curves, but there’s nothing too difficult about it.
Needless to say, if the flare is so severe that one or more channels are completely ruined, this method won’t work, and you’ll need to find another way.
Conclusion:
Don’t think for a second that I don’t recommend using the Clone Tool. It’s indispensible for many purposes. But it’s handy to have some other tricks up your sleeve in some cases.