
Simulating Channel Mixer in Photoshop Elements
Occasionally I have suggested using the Channel Mixer adjustment layer to convert a photo (or part of a photo) to black-and-white. Unfortunately Channel Mixer is only available in Photoshop, not Elements, but I’ve found this workaround.
It’s a bit awkward and time-consuming, but it’ll suit you if you really need to isolate a channel in PSE.
This tutorial was captured in PSE11, but will work for any version.
Part 1: The overall conversion
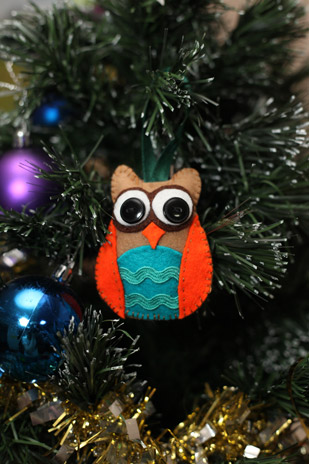
Let’s say you showed me this photo, and complained that you were having trouble making a punchy black-and-white out of it:
I would take a look at the photo in Photoshop, and examine each channel:
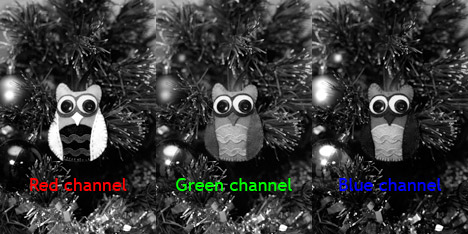
The green and blue channels are rather dull, but the red channel has the most impact. That’s the one I’d tell you to use for your B&W conversion.
First layer: Solid Color
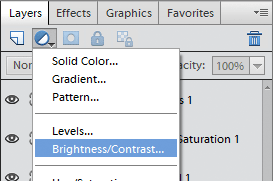
In the Layers panel, add a "Solid Color" layer:
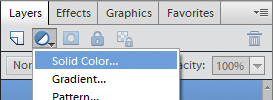
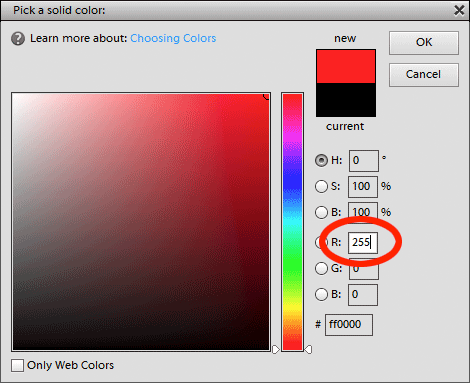
Because you want to use the red channel, choose solid red (255/0/0) for your colour:
Set its blend mode to "Multiply":
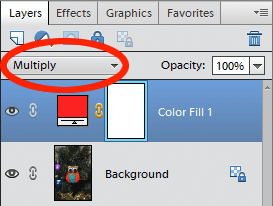
And now your image looks like this:
Second layer: Hue/Saturation
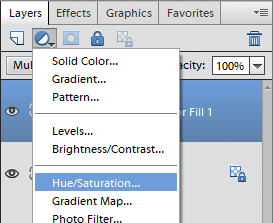
Add a Hue/Saturation layer …
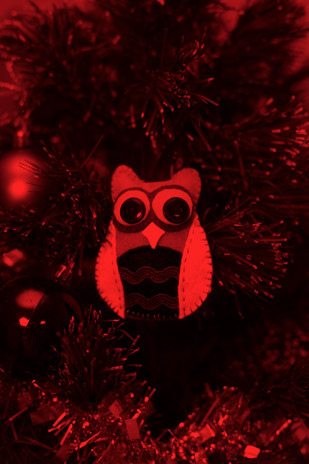
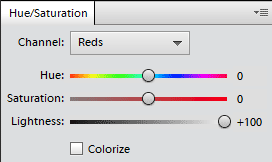
… and go to the colour you’re using (Red in this example) and move the Lightness slider all the way to the right:
Ta-da! The red channel, looking just like it does in Photoshop:
Go ahead and do your editing
If the goal was to convert the whole photo to black-and-white using this method, you have succeeded. Now you can go ahead and do your normal editing to turn your photo into a masterpiece.
However, if the purpose of this little adventure was to turn just part of the photo into black-and-white this way, read on …
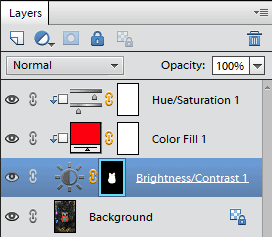
Part 2: Adding a clipping mask layer
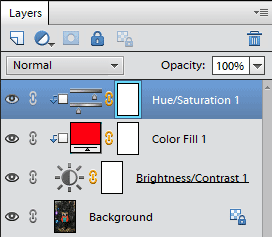
First, click on the Background layer:
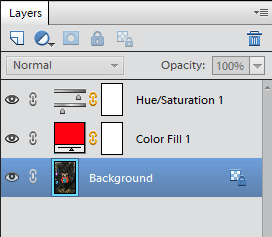
Then add a new adjustment layer. It doesn’t matter which one you choose, because you won’t actually be making any adjustments to it. I’ve chosen a Brightness/Contrast layer in this example:
Then clip the three other layers to the new layer. To do this, select each of the three layers in turn, and press Ctrl G (Cmd G for Mac) on each one. That will clip them to the layers below, resulting in the little downward-pointing arrow icons on each layer as you see here:
That’s all there is to it. Now they are linked to the bottom layer, you can paint on the mask of that layer to control where the black-and-white conversion is to be visible.
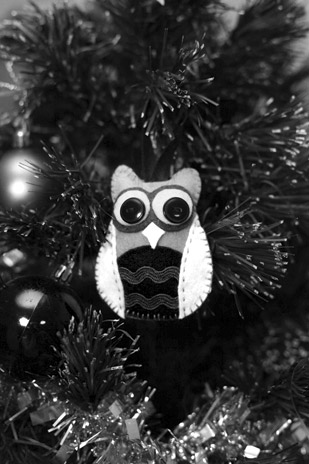
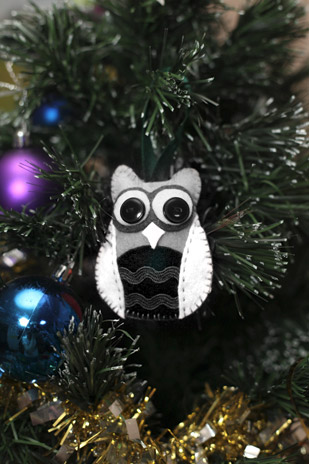
In this example, I’ve only converted the ornament to black-and-white:
The result looks like this:
Why? Why are we doing this?
As I said at the beginning, you’re likely to be reading this tutorial because I have specifically directed you to it from a forum.
But if you’ve come across this tutorial randomly in your browsings, you might be wondering what the point is. Especially of that last bit – why make a black-and-white owl in a coloured photo?? And why did Damien do such a dodgy job of masking that I can see where he has partially made the tree black-and-white as well?
Well, the truth is I had no specific purpose for removing the colour from that owl, other than as a demonstration. But there are times when it is handy.
Here are two examples:
Notes
- Obviously, you can do this with any of the three channels. Just change the colour of that Solid Color layer at the beginning.
- The Channel Mixer adjustment layer in Photoshop is capable of more exciting things than just black-and-white conversions. I haven’t figured out how to replicate those yet. If I do, I’ll write another post.
- In Photoshop, you can easily view each of the three channels to decide which one is best to use before adding the Channel Mixer layer. Up til now this hasn't been possible in Elements. But I'm very excited to report I've made an action for it.
- Owing to the aggressive Levels adjustment involved in this method, there is a moderate to high risk of banding. Please check the quality of your image carefully after using this technique.